

These 20 copy-and-paste AI prompts for blog writing cover the three places writers get stuck most: intros, outlines, and conclusions. Staring at a blank page is the slowest part of blogging, so fill in the brackets, paste into any AI tool, and get a usable first draft in minutes.
Who this is for
Bloggers, students, marketers, and small business owners who want faster drafts without publishing generic, robotic content.
What you get
7 intro prompts, 7 outline prompts, 6 conclusion prompts, a full worked example, and a method for chaining them into a finished post.
Most people type something vague like “write a blog post about X” and get bland, interchangeable text. The fix is not a smarter AI. It is a clearer prompt. Google’s own guidance on creating helpful, people-first content makes it clear that quality, originality, and usefulness matter more than how a draft was produced. If you are brand new to these tools, start with our guide to AI tools for beginners, then come back here.
Can You Use AI to Write a Blog Post? (And Which AI Is Best?)

Yes, you can. Google has stated that its ranking systems focus on the helpfulness of content rather than on whether a person or an AI wrote it, as explained in its post on Google Search and AI-generated content. What Google does not reward is mass-produced, low-value pages. So the real question is not “can I use AI?” but “will my post be genuinely useful?”
Understanding what is happening behind the screen helps you prompt better. Our explainer on how AI tools work covers why these models predict text and why they need clear instructions and human review.
As for the best AI, there is no single winner. The right tool depends on the job. Here is a practical comparison for blog work.
| Feature | ChatGPT | Claude | Gemini | Perplexity |
|---|---|---|---|---|
| Strength | Fast brainstorming and varied headline styles | Natural-sounding long-form drafting and editing | Works inside Google apps like Docs and Gmail | Research with cited sources |
| Weakness | Default tone can feel generic | Can be cautious; edit for punch | Style can feel plain without detailed instructions | Not built for long creative drafts |
| Best for | Ideas, intros, outlines | Full sections and rewrites | Drafting inside Google Workspace | Fact-finding before you write |
| Pricing | Free plan plus paid tiers | Free plan plus paid tiers | Free plan plus paid tiers | Free plan plus paid tiers |
Plans and limits change often, so always check each provider’s pricing page. You can try ChatGPT, Claude, Gemini, and Perplexity for free and see which voice suits you. For a deeper look at one of them, read our ChatGPT review, and if you are still deciding, our framework for choosing the right AI tools will help. Every prompt in this post works in all four.
How to Use These AI Prompts for Blog Writing (Copy, Paste, Customize)
Every template below uses square brackets for the parts you replace, like [topic] or [audience]. The more specific your brackets, the better the result. Here is the simple process:
- Pick the prompt. Choose the intro, outline, or conclusion style that fits your post.
- Fill every bracket. Replace [topic], [audience], and [tone] with real details. Leftover brackets confuse the AI.
- Paste and run. Use any AI chat tool. Start a fresh chat for each new post.
- Ask for a revision. Try follow-ups like “make it shorter” or “use a warmer tone.”
- Add your voice. Insert a real example, opinion, or detail only you could write.
Strong prompts share the same ingredients. Use this table as a checklist when you customize any template.
| Prompt part | What to include | Example |
|---|---|---|
| Role | Who the AI should act as | “Act as an experienced blog editor” |
| Topic | The exact title or subject | “How to start meal prepping” |
| Audience | Who will read it | “Busy beginners with no cooking skills” |
| Tone | How it should sound | “Friendly, practical, no jargon” |
| Length | A word or section limit | “Under 120 words” |
| Format | The shape of the output | “H2 headings with two bullet points each” |
A strong prompt
- Names the reader: “for first-time bloggers”
- Sets limits: word count, number of sections, tone
- Describes the output: exactly what shape you want back
A weak prompt
- Too vague: “Write a blog post about marketing”
- No audience: the AI guesses who you are writing for
- No constraints: you get long, padded, generic text
The 80/20 Rule for Blogging: Where AI Helps Most
The 80/20 rule comes from the Pareto principle, the idea that a small share of effort often produces most of the results. In blogging, it is a useful rule of thumb rather than a hard law: a minority of your work (original insight, real examples, strong titles) creates most of the value for readers.
That is exactly where AI fits. Let it handle the time-heavy structure work such as outlines, first drafts, and rewording. Keep the high-value part for yourself: your experience, your opinions, and your fact-checking. Anyone can ask an AI for a generic post. Only you can add what you have actually seen and tested.
| Blog task | Let AI handle | You handle |
|---|---|---|
| Topic ideas | Generating 20 options fast | Choosing what fits your audience |
| Outline | Building the structure | Reordering and cutting weak sections |
| Intro | Drafting several hook styles | Picking one and adding a personal detail |
| Body sections | First-pass drafting | Examples, data, and opinions |
| Conclusion | Summarizing key points | Writing a call to action that sounds like you |
| Final check | Grammar and readability suggestions | Fact-checking every claim |
Rule of thumb: Treat AI output as a solid first draft, not a finished post. The final stretch of editing is where a forgettable post becomes a ranking one.

7 Best AI Prompts for Blog Introductions (Hook, Story, Statistic, Contrarian, Problem-Agitate-Solve, Question, and Promise)
Readers decide in a few seconds whether to keep reading. Each prompt below produces a different style of opening, so you can generate two or three and choose the strongest.

1. The hook intro
Best for most posts. It leads with a sharp first line and previews what is coming.
Write a blog post introduction for the title "[title]". Open with a one-sentence hook aimed at [audience]. State the problem in the second sentence, promise a clear outcome, and preview the main sections. Keep it under 120 words. Tone: [tone].2. The story intro
Best for personal, lifestyle, and how-to posts where a relatable moment builds trust.
Write an introduction for "[title]" that opens with a short, specific scene from the day of a [type of reader]. Then connect that scene to the topic in 3 to 4 sentences and end with a promise of what the post will teach. 100 to 130 words. Do not invent real people or statistics; treat the scene as a hypothetical example.3. The statistic intro
Best for data-driven posts. Always supply the statistic yourself so the AI does not make one up.
Write an introduction for "[title]" that opens with this statistic: [paste statistic and its source]. Explain in one or two sentences why it matters to [audience], then lead into what the post covers. Use only the statistic I provided. 100 to 120 words.4. The contrarian intro
Best for opinion posts and myth-busting. It challenges something readers believe.
Write an introduction for "[title]" that challenges a common belief about [topic]. State the conventional wisdom in one sentence, explain why it falls short, and preview the better approach the post will teach. Keep it confident but fair. Under 130 words.5. The problem-agitate-solve intro
Best for solution-focused posts. It names a pain, makes it feel real, then offers relief.
Write an introduction for "[title]" using the Problem-Agitate-Solve framework. Problem: name the main frustration [audience] faces with [topic]. Agitate: show what it costs them in time, money, or stress. Solve: promise the solution the post delivers. 120 to 150 words. Tone: [tone].6. The question intro
Best for beginner guides and FAQ-style posts that match a question people search for.
Write an introduction for "[title]" that opens with the question [audience] most often asks about [topic]. Answer it briefly in the next two sentences, then explain what extra detail the full post provides. Keep it under 110 words and avoid jargon.7. The promise intro
Best for step-by-step guides and templates. It tells the reader exactly what they will walk away with.
Write an introduction for "[title]" that makes one clear promise in the first sentence: by the end of the post, [audience] will be able to [specific outcome]. Then list in one sentence what is included (for example, steps, templates, or examples) and how long it will take. Under 100 words.Want to go further? The AIDA model (Attention, Interest, Desire, Action) is another classic framework you can swap into any of these prompts.
7 Best AI Prompts for Blog Post Outlines (Standard, Listicle, How-To, Comparison, Beginner’s Guide, SEO Outline, and FAQ Outline)
A good outline makes every later step faster and keeps the post focused. Pick the prompt that matches your post type.
8. The standard blog outline
Create a detailed outline for a blog post titled "[title]" for [audience]. Include an introduction, 5 to 7 H2 sections with 2 to 3 H3 sub-points each, and a conclusion. For every H2, add one sentence stating the key takeaway.9. The listicle outline
Create an outline for a listicle titled "[number] [topic] for [audience]". For each item give a short subheading, a one-sentence description, a real-world example or use case, and one actionable tip. Add a short intro and a closing recap.10. The how-to outline
Create a step-by-step outline for a how-to post on "[task]" for [audience]. Include a "what you need" section, 4 to 8 numbered steps, and for each step the action, why it matters, and one common mistake. End with a troubleshooting section and next steps.11. The comparison outline
Create an outline for a comparison post: "[A] vs [B]" for [audience]. Include a quick verdict, the comparison criteria, a table plan, pros and cons of each, who should pick which, and a final recommendation. Keep the structure fair to both options.12. The beginner’s guide outline
Create an outline for a beginner's guide to [topic]. Assume zero prior knowledge. Include key definitions, foundational concepts in a logical order, a simple first-steps section, common beginner mistakes, and a short list of next resources.13. The SEO outline
Create an SEO-focused outline for a blog post titled "[title]" targeting the keyword "[primary keyword]". The search intent is [informational/commercial]. Include a meta title under 60 characters, a meta description under 155 characters, an H1, H2 and H3 headings that use related keywords naturally, a suggested FAQ list, and internal linking ideas.14. The FAQ outline
Create an FAQ-style outline for a post about [topic]. List 8 questions that real people would type into a search engine, grouped under 3 to 4 H2 headings. For each question, note the answer length (short, medium, or detailed) and whether it needs an example or a list.6 Best AI Prompts for Blog Conclusions (Recap, CTA, Question, Emotional Close, Next-Step, and Email Opt-In)
A weak ending wastes the attention you earned. These prompts help you close with purpose. Always include your main points so the AI summarizes your actual post rather than guessing.
15. The recap conclusion
Write a conclusion for a blog post titled "[title]". The main points were: [list 3 to 5 takeaways]. Recap them in 2 to 3 sentences, restate the main benefit for [audience], and end with one memorable closing line. Under 120 words.16. The CTA conclusion
Write a conclusion for "[title]" that ends with one clear call to action: [desired action, such as read a related guide or download a template]. Summarize the key takeaway in two sentences, explain the benefit of taking the action, and keep the tone [tone]. Under 100 words.17. The question conclusion
Write a short conclusion for "[title]" that summarizes the main lesson in two sentences, then ends with an open question that invites readers to share their own experience in the comments. Warm, conversational tone. Under 90 words.18. The emotional close
Write a conclusion for "[title]" that acknowledges how [audience] feels about [problem], reassures them that progress is realistic, and encourages them to take the first small step. Keep it sincere and avoid clichés or exaggerated promises. Under 110 words.19. The next-step conclusion
Write a conclusion for "[title]" that turns the post into an action plan. Give the reader exactly three next steps they can complete in [timeframe], in order, with one short line explaining each. End with a sentence that points to [related post or resource].20. The email opt-in conclusion
Write a conclusion for "[title]" that recaps the key takeaway in two sentences and then invites readers to join my email list for [lead magnet or benefit]. Include a short headline (under 10 words), one sentence describing what they get, and button text of 2 to 4 words. Tone: helpful, never pushy.Worked Example: One Topic, Three Prompts, Real Output (Before vs. After)
Templates are easier to trust when you can see the difference they make. Here is one topic, “how to start meal prepping as a beginner,” taken through an intro, an outline, and a conclusion. First, the intro.
Before: weak prompt
Prompt: “Write an intro about meal prepping.”
Output: “In today’s fast-paced world, meal prepping has become increasingly popular. In this article, we will explore the topic of meal prepping and discuss its many benefits.”
After: Prompt 1 (hook intro)
Prompt: The hook intro template, filled in for beginners with no cooking skills and a friendly, practical tone.
Output: “It is 6:40 p.m., the fridge is nearly empty, and delivery is starting to look like the only option. Meal prepping fixes that evening before it happens. This beginner guide shows you how to prep five simple weekday lunches in about 90 minutes, with a basic shopping list, a four-step routine, and the mistakes to skip.”
The first version could open any post on any topic. The second names a real moment, promises a specific result, and previews the structure. Next, the outline, built with the how-to outline prompt.
Outline output:
- What You Need Before You Start: containers, a basic shopping list, and a free 90-minute window
- Step 1, Pick Five Simple Recipes: choose meals that reheat well; common mistake is choosing too many different recipes
- Step 2, Shop With a List: group ingredients by store section to save time
- Step 3, Cook in Batches: start with the longest-cooking item first
- Step 4, Cool, Portion, and Store: follow safe storage practices
- Troubleshooting: soggy food, boring flavors, and wasted leftovers
- Next Steps: scale up to dinners once lunches feel easy
Notice how the outline already carries practical reasoning, such as the common mistake flagged in step 1, which makes drafting each section far easier. Finally, the conclusion.
Before: weak prompt
Output: “In conclusion, meal prepping is a great way to save time and money. We hope this article was helpful. Thanks for reading!”
After: Prompt 19 (next-step conclusion)
Output: “You do not need a perfect system, just one good Sunday. This week, do three things: pick five easy recipes, shop with a written list, and cook everything in one 90-minute session. Next weekend, adjust what did not work. By your third batch, weekday lunches will take care of themselves.”
Your turn: Swap in your own topic and compare the weak and strong versions side by side. The gap is usually obvious, and it shows exactly which brackets you need to fill in more specifically.
Best Blog Post Format and Free Templates You Can Copy
There is no single best format. The best one matches the reader’s goal. Most successful posts do share a skeleton: a clear title, a short intro, scannable subheadings, short paragraphs, helpful visuals or tables, and a conclusion that tells the reader what to do next. Pick the format that fits your topic.
| Format | Best for | Core structure |
|---|---|---|
| How-to guide | Teaching a process | Intro, what you need, numbered steps, troubleshooting, next steps |
| Listicle | Tips, tools, ideas | Intro, numbered items with short explanations, recap |
| Comparison | Helping readers choose | Verdict, criteria, table, pros and cons, recommendation |
| Beginner’s guide | Broad introductory topics | Definitions, basics, first steps, mistakes, resources |
| Case study | Proving results | Background, problem, action, result, takeaway |
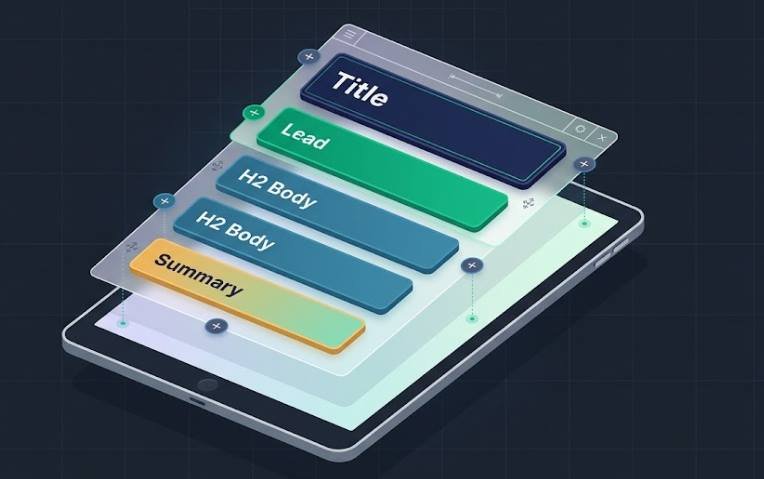
Here is a simple, free template you can copy into Google Docs, Microsoft Word, or any notes app and reuse for every post:
TITLE: [primary keyword + benefit]
LEAD (2-3 sentences): [hook + promise + preview]
INTRO: [problem + why it matters + what the post covers]
H2 #1: [main section] -> 2 to 3 short paragraphs + 1 example
H2 #2: [step, tip, or item] -> short explanation + 1 bullet list
H2 #3: [step, tip, or item] -> short explanation + 1 table or image
H2 #4: [common mistakes]
FAQ: [3 to 5 real questions with short answers]
CONCLUSION: [recap + one clear next step]
CTA: [related post, download, or email sign-up]
Students can use the same skeleton for essays and study notes by putting a thesis statement in the intro and replacing the CTA with a short list of sources.
How to Chain These Prompts Into a Full Blog Post
Do not try to write a whole post with one giant prompt. Chaining, where each output feeds the next prompt, gives you more control and better quality. Run everything in one chat so the AI remembers your earlier choices.
| Step | What you do | What you paste into the next step |
|---|---|---|
| 1. Topic | Ask for 10 title ideas aimed at your audience | Your chosen title |
| 2. Outline | Run the outline prompt that fits the post type | The edited outline |
| 3. Intro | Generate two or three intro styles | The intro you keep |
| 4. Sections | Ask for one section at a time, with your notes and examples | Each approved section |
| 5. Conclusion | Paste the main points and run a conclusion prompt | The final ending |
| 6. Edit | Ask for clarity, flow, and tone fixes | The polished draft |
A handy line to add between steps: “Using the outline above, write section 3 only. Keep the same tone as the intro.” This keeps your voice consistent. If you want more workflow ideas to save time on writing and research, see our guide to AI tools for productivity.

How to Make AI-Written Intros and Conclusions Sound Human
AI drafts often share the same tells: stock openers, vague claims, and tidy but empty endings. Readers notice, and it weakens trust. Replace those tells with specifics.
| AI-sounding phrase | Why it fails | Fix it with |
|---|---|---|
| “In today’s fast-paced world…” | Could open any article | A specific moment or problem |
| “Unlock the power of…” | Vague hype | What the thing actually does |
| “It is important to note that…” | Filler | Delete it and state the point |
| “In conclusion…” | Signals a generic ending | Start with the takeaway itself |
| “Whether you are a beginner or an expert…” | Speaks to no one | Name the one reader you mean |
You can also ask the AI to do the cleanup. Paste your draft and run this:
Rewrite the text below so it sounds like a real person wrote it. Remove clichés and filler phrases, vary sentence length, use plain words, and keep my meaning. Do not add new facts. Highlight any sentence that makes a claim I should double-check.

[paste text]
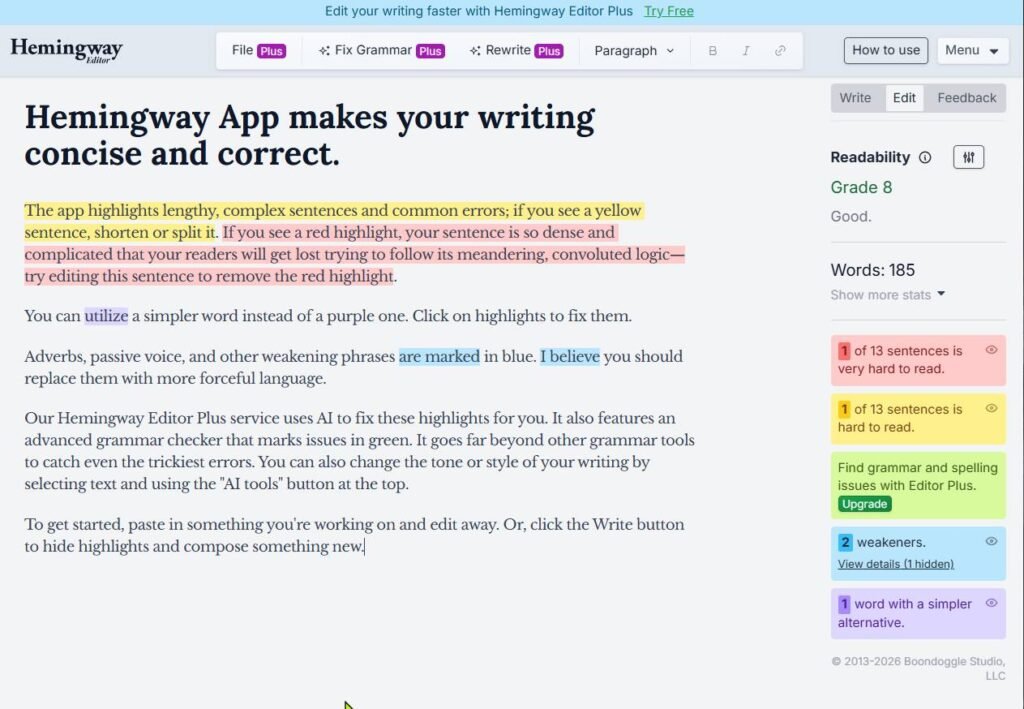
Then read the result out loud, add one personal detail, and run it through a readability tool such as the Hemingway Editor. For a refresher on what readability scores measure, see this overview of the Flesch-Kincaid readability tests. More habits that improve your results are covered in our tips to get the most out of AI tools.
Common Mistakes When Using AI Prompts for Blog Posts
Most disappointing AI output traces back to a small set of avoidable mistakes. Check your process against this list.
| Mistake | Why it hurts | Better approach |
|---|---|---|
| Publishing the first draft | Reads generic and may contain errors | Edit, add examples, and fact-check |
| Leaving brackets unfilled | The AI guesses or repeats the placeholder | Replace every bracket with specifics |
| Not naming the audience | Tone and depth are off | State exactly who the reader is |
| Trusting statistics blindly | AI can invent numbers or sources | Supply your own data and verify sources |
| Writing the whole post in one prompt | Shallow, repetitive sections | Chain prompts step by step |
| Using identical prompts for every post | Posts start to sound alike | Change the intro style and add unique angles |
| Ignoring search intent | Content does not match what people want | Check what already ranks and fill the gaps |
One more caution: publishing large volumes of unedited AI pages just to rank is exactly what Google’s spam policies target. Quality and originality are the safer long-term strategy.
Quick fact-check habit: Before publishing, highlight every number, date, name, and quote in your draft and verify each one against a reliable source.
Blog Prompt Generator: Build Your Own Prompts
Once you understand the pattern, you can make prompts for any blog task. Every good prompt follows the same formula: role + task + context + format + constraints. You can even ask the AI to build the prompt for you. Both OpenAI’s prompt engineering guide and Anthropic’s prompt engineering overview recommend being clear, specific, and showing examples of what you want.
Act as an expert prompt writer for bloggers. I need a reusable prompt for [blog task, such as writing product review intros]. My audience is [audience], my tone is [tone], and my usual post length is [length]. Create one prompt template with [bracketed] placeholders, then show me a filled-in example. Ask me up to three questions first if you need more detail.Save the prompts that work in a document or notes app, and keep a short “voice sample” of your own writing to paste at the start of each chat. Over time you will build a personal prompt library tuned to your blog.
Are Blogs Still Worth Writing Today?
Yes, with a catch. AI summaries and search features mean generic, surface-level posts earn less attention than they used to. But blogs that offer real experience, original examples, clear expertise, and a trusted voice still attract readers, build email lists, and support businesses. Google continues to emphasize helpful, people-first content in its content guidelines, and that is the lane where a thoughtful blogger can win.
Why blogging still works
- You own it: your site and email list are not at the mercy of a social algorithm
- Trust compounds: useful posts keep working long after publishing
- Experience stands out: first-hand knowledge is hard to copy
Where it is harder
- Generic topics: basic answers are easily summarized elsewhere
- Slow results: growth takes consistent publishing over time
- Crowded niches: you need a clear angle to be noticed
Frequently Asked Questions About AI Prompts for Blog Writing
What is the 80/20 rule for blogging?
It is a rule of thumb based on the Pareto principle: a small portion of your effort, such as original insight, strong titles, and genuinely useful content, produces most of your results. With AI, you can speed up the routine work and spend your saved time on that high-impact part.
What are the top 10 AI prompts for blog posts?
The most useful ones cover: (1) topic ideas, (2) a full outline, (3) an intro, (4) a section expansion, (5) a conclusion, (6) headline variations, (7) a meta description, (8) an FAQ list, (9) an editing and tone pass, and (10) repurposing the post into social or email content. The 20 templates above cover the outline, intro, and conclusion prompts (items 2, 3, and 5) in depth.
Where can I find the best ChatGPT prompt templates?
Start with the templates in this post, then build your own using the prompt formula above. You can also study the official OpenAI prompt engineering guide. Saving your best-performing prompts in a document is often more valuable than any public list, because they are tuned to your voice.
How do I start the introduction of a blog post?
Open with something that earns attention: a specific problem, a relatable moment, a surprising fact you can verify, or a clear promise. Then state what the reader will gain and preview the post. Keep it short, usually under 150 words.
Which AI is best for writing a blog?
It depends on the task. Many writers use one tool for brainstorming and headlines, another for long drafts and editing, and a research-focused tool for facts and sources. Test the same prompt in two or three tools and keep the one whose output needs the least editing. Our overview of AI tool types can help you understand the options.
Can AI-written blog posts rank on Google?
They can, as long as the content is helpful, accurate, and original. Google has said it rewards quality regardless of how content is made, but it discourages mass-produced pages created mainly to manipulate rankings. Review its guidance on AI-generated content for the details.
How long should a blog introduction be?
Aim for roughly 80 to 150 words, or two to four short paragraphs at most. The goal is to hook the reader, state the problem, and promise the outcome without delaying the actual content.
Final Thoughts
AI will not replace your voice, but the right prompts can remove the slowest parts of writing. Use the 7 intro, 7 outline, and 6 conclusion templates above, fill in the brackets with real detail, chain them into a workflow, and always finish with your own edits and fact-checking. Start by copying just one prompt today, and if you want to keep building your skills, explore our power-user tips for AI tools next.